Jewelry prep is the step most people skip and then spend hours regretting in post. A fingerprint invisible to the naked eye becomes a greasy smear at macro scale. A single fiber of dust reads as a log across a faceted stone. Spending five minutes cleaning before the first shot is almost always faster than retouching the same mark out of forty frames.
Key takeaways
- The camera resolves detail your eye misses, so clean before every session and between setups
- Handle every piece with lint-free gloves or a cloth from the moment it comes out of the box
- Match the cleaning method to the material: what is safe for gold can damage pearls or soft stones
- Use a blower right before the shot, not a cloth, so you do not deposit fibers at the last second
- Zoom to 100 percent on a test frame to catch marks invisible at normal magnification
Why Prep Matters More Than You Think
A camera lens resolves far more than the human eye at arm’s length. When you add a macro lens or extension tubes and work at close distances, that resolving power increases again. The result is that every skin oil, every particle of settling dust, and every micro-scratch on the surface becomes part of the image.
Polished metal is the worst offender because it acts like a mirror. Fingerprints scatter light in every direction, producing a hazy smear right where you want crisp reflections. Gemstone facets pick up dust and scatter it into the light path, dulling the sparkle that makes the stone worth photographing. Even a piece that looks flawless in your hand can fail the camera the moment the shutter fires.
The other reason prep matters is consistency. When you clean thoroughly at the start and keep gloves on throughout, every frame in the session starts from the same clean baseline. You can batch-retouch efficiently because each image has the same minor flaws rather than a random assortment of new prints and smudges.
Safe Handling from the Start
The best cleaning strategy is avoiding contamination in the first place. Skin oils transfer instantly, and some pieces are too delicate to clean aggressively.
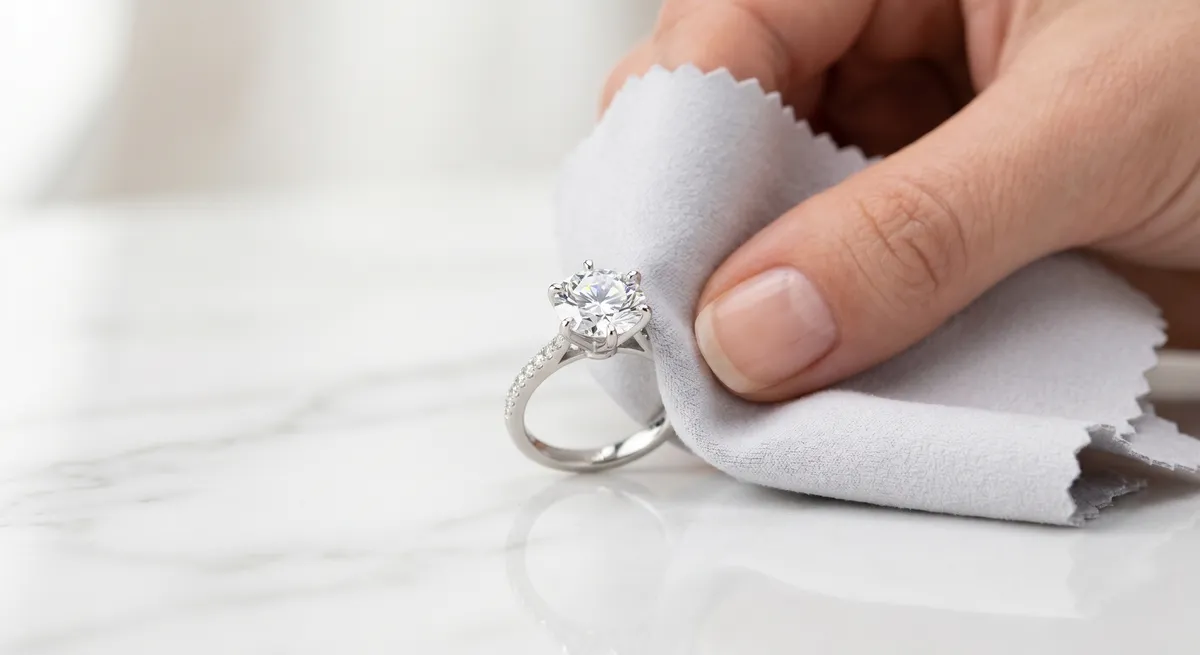
Before you open any packaging, put on gloves. Lint-free cotton gloves are standard and inexpensive. Nitrile gloves work too and give more dexterity. If gloves feel awkward for small pieces, hold the item with a folded microfiber cloth or use soft-tipped tweezers for positioning. The rule is simple: bare skin never touches the piece once it is out of the bag.
When you need to reposition the piece on set, reach for the tweezers rather than removing a glove. Tweezers let you nudge a ring into the exact angle you want without ever setting the piece down and picking it back up with your fingers.
Cleaning by Material
Different materials need different approaches. A cleaning method that is perfectly safe for a solid gold band can permanently damage a soft gemstone or a pearl’s nacre.
Gold and platinum
A soft brush, warm water, and a drop of mild dish soap work well. Rinse thoroughly, then pat dry with a lint-free cloth. Ultrasonic cleaners are safe for solid gold with no glued or fracture-filled stones.Silver
Wipe with a dry or very lightly dampened microfiber cloth. Silver polishing cloths remove tarnish quickly. Avoid submerging pieces with oxidized finishes you want to keep.Hard gemstones
Diamonds, rubies, sapphires, and most hard stones handle a soft brush with mild soapy water. Rinse and dry thoroughly. Avoid steam or ultrasonics if the stone has fractures or is fracture-filled.Pearls and soft stones
Wipe with a dry lint-free cloth only. Pearls are porous and sensitive to acids, alcohol, and even mild soap. Opals, emeralds, and turquoise are also vulnerable to moisture and chemicals. Less is always more.After any wet cleaning, allow the piece to air dry completely before placing it on set. A damp piece fogs under studio heat and attracts new dust faster than a dry one.
Removing Dust on Set
Even after thorough cleaning, dust settles. Studio air is full of particles, and the act of carrying a piece to the set and positioning it with tweezers can disturb settled dust or deposit new fibers. The solution is a blower bulb used at the last possible moment.
A blower bulb (sometimes called a rocket blower) produces a controlled puff of air that lifts loose particles without touching the surface. Hold it a few centimeters above the piece and give two or three gentle puffs from slightly different angles. Tilt the piece toward you after blowing so displaced particles fall away from the surface rather than resettling on it.
Do not use canned compressed air on jewelry. The propellant can leave a residue and the pressure is often too high for delicate settings. A manual rubber blower is safer and gives you more control over the direction and force of the air.
Blow the piece after positioning it and again right before firing the shutter, especially if the session is running long. Dust settles continuously, and macro will find it.
Checking at 100 Percent
Your eye at normal distance will not catch every problem. Before committing to a full set of angles, fire a test frame and zoom in to 100 percent in your camera’s playback or on a tethered screen.
Look across every reflective surface for haze, smears, or individual fibers. Check inside the setting around prongs, where dust collects. Look at the underside of the piece if it is visible in the frame. Scan the background for fibers that may have transferred from the piece during positioning.
If you find a mark, note exactly where it is, remove the piece with tweezers or gloves, address the specific spot with a cloth or blower, then return it to position and fire another test frame. Repeat until the 100 percent view is clean. This discipline at the start of a session prevents discovering the same problem in every frame during culling.
Keeping It Clean Between Setups
A cleaned piece does not stay clean indefinitely, especially in an active studio. Build a few habits to maintain the baseline across an entire shoot.
Return pieces to a clean, covered surface or a velvet tray between setups. A lidded box is better than an open tray if the session is long. Never set a piece down on a bare table or the shooting surface without checking for dust or debris first.
Do a quick blower pass and a 100 percent check whenever you change an angle or reposition the piece significantly. If you are shooting multiple pieces in a session, clean and tray each one before moving to the next rather than leaving cleaned pieces out and exposed.
Shooting tethered makes this process faster because you can see the 100 percent view on a monitor without walking back and forth to the camera. If you are shooting untethered, build in a review pause every five to ten frames so problems do not carry through an entire sequence unnoticed.
For more on getting the most out of close-up work, see the guide on controlling reflections in jewelry photography and the guide on macro jewelry photography. The full workflow from setup to export is covered in the jewelry photography overview.
Frequently Asked Questions
Why does my jewelry look dusty or smudged in photos?
Macro and high resolution reveal dust and fingerprints invisible to the eye. Clean with a soft cloth and blower, and handle with gloves.
How do I keep fingerprints off during a shoot?
Wear lint-free gloves or hold pieces with a cloth or tweezers, and clean between setups.
Related guides

How to Eliminate Glare & Reflections on Jewelry
Macro Jewelry Photography

How to Photograph a Diamond Ring
Keep exploring: the complete guide, gear reviews, pricing, or find a photographer.