Key takeaways
- Macro photography reveals hallmarks, prong detail, and facet structure that standard shots miss entirely
- A dedicated macro lens is ideal, but phone macro modes and clip-on lenses produce strong results for most sellers
- Tripod plus timer is non-negotiable; at 1:1 magnification, a breath is enough to blur a shot
- Depth of field shrinks dramatically at macro distances; stop down and consider focus stacking for complex pieces
What Macro Reveals and Why It Sells
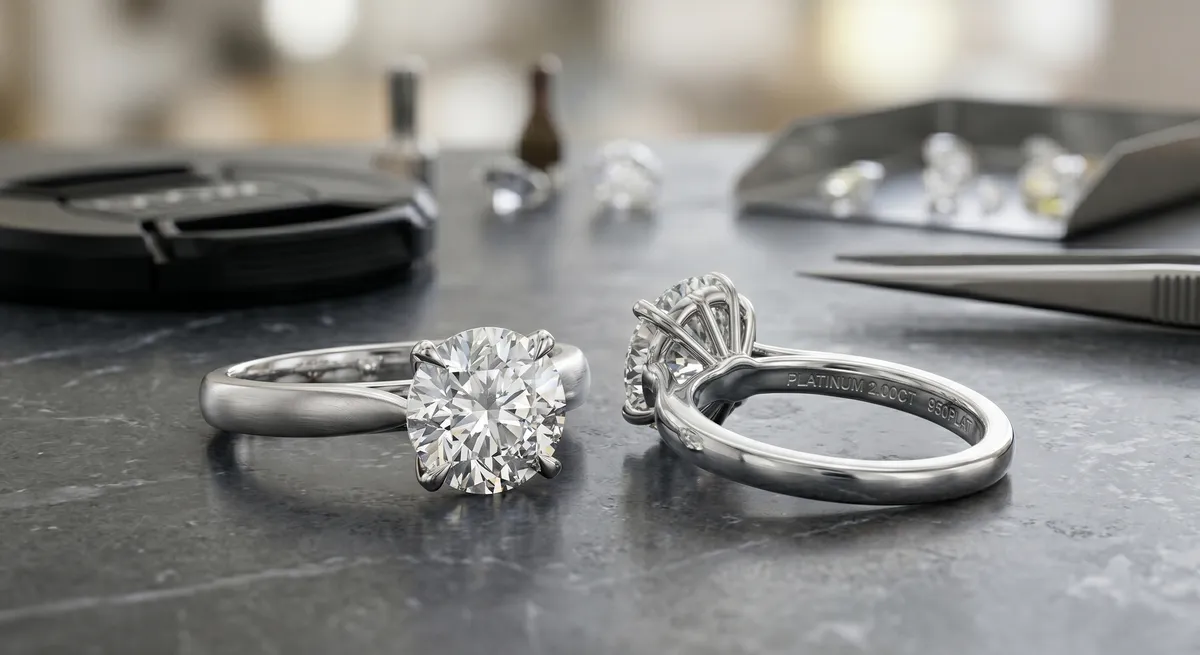
Standard product photos show the whole piece. Macro photos show buyers what the piece actually is.
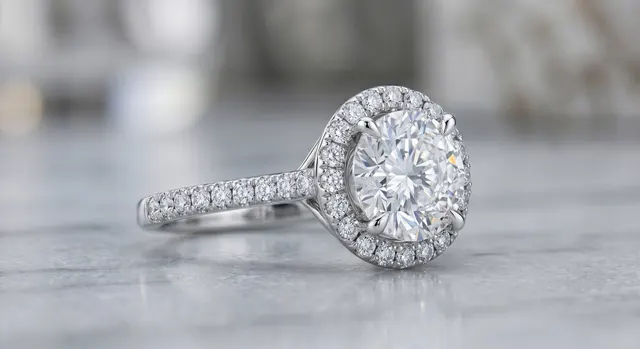
A hallmark stamped inside a ring shank becomes legible rather than invisible. The prongs holding a center stone reveal whether they are rounded, claw-cut, or shared. Facet lines on a sapphire trace the geometry of the cut. Milgrain edging on an antique setting resolves from a fuzzy border into individual beaded detail.
That transparency builds purchase confidence. Buyers who can see exactly what they are getting have fewer surprises when the piece arrives, fewer returns, and more positive reviews. For handmade and vintage sellers, close-up shots communicate craftsmanship in a way no listing copy can replace.
Gear Options
You do not need the same setup for every shooting situation. The right choice depends on your camera, your budget, and how tight you need to get.
Dedicated macro lens
A true macro lens (50 mm, 60 mm, or 100 mm) achieves a 1:1 reproduction ratio, meaning the subject projects onto the sensor at actual size. The 100 mm focal length is the most useful for jewelry because it gives you more working distance between the lens and the piece, leaving room to position lights without crowding the subject.Phone macro mode
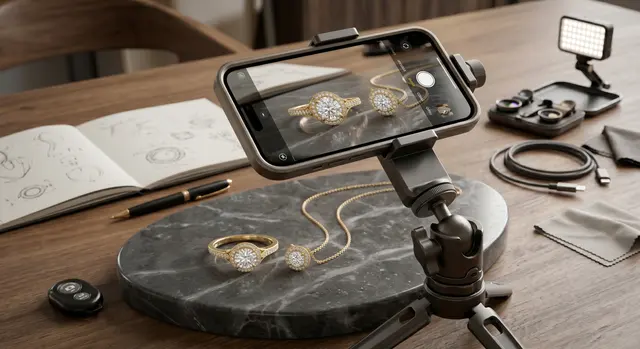
iPhone 13 Pro and newer, and many recent Android flagships, have a dedicated macro lens that focuses as close as 1 to 2 cm. Results are excellent for most listing purposes, and the workflow is fast. The limitation is that you cannot change the focal length or use a larger sensor for low-light performance.Clip-on macro lens
A screw-on or clip-on macro lens attaches over your phone camera and boosts magnification significantly. Options like the Moment Macro 10x produce sharp results for under $100. They work with any phone, including older models without a built-in macro mode, and add virtually no weight to your kit.Extension tubes
Extension tubes fit between a DSLR or mirrorless body and any standard lens, moving the lens further from the sensor and enabling close focusing. They cost far less than a dedicated macro lens and let you repurpose a lens you already own. The trade-off is a loss of autofocus on some camera systems and a need for more light.Stability
Magnification amplifies everything, including movement. At 1:1 reproduction ratio, a vibration invisible in a wide shot blurs the entire frame.
The minimum requirement is a tripod and a way to trigger the shutter without touching the camera. A two-second self-timer eliminates the shake from pressing the shutter button. A cable release or wireless remote is more reliable for longer sessions. On a mirrorless camera, the electronic shutter removes the brief shake that mechanical shutters introduce.
Use a hard, stable surface. Tabletop tripods work well for macro because they position the camera low near the shooting surface. Do not touch anything between frames if you plan to focus stack.
Depth of Field at High Magnification
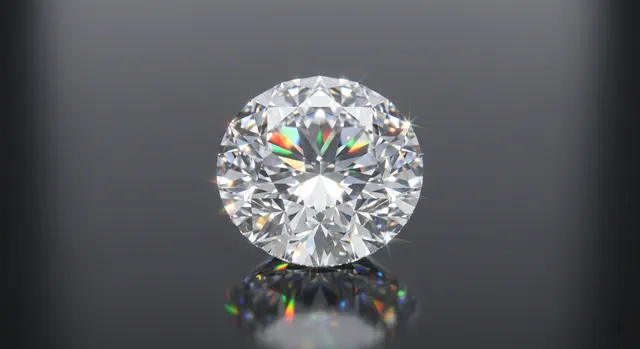
At macro distances, depth of field collapses to a few millimeters or less even at moderate apertures. At 1:1 with a 100 mm lens at f/5.6, you get roughly 0.5 mm of sharp zone. A small diamond is 6 mm deep, which means only one thin slice of facets can be sharp in a single frame.
Stopping down to f/11 or f/16 extends depth of field to 1 to 2 mm. Going smaller than f/16 introduces diffraction softening, where the aperture itself degrades sharpness rather than improving it.
When depth of field at f/16 still cannot cover the full piece, focus stacking is the answer. You shoot a series of frames at different focus positions, each capturing a thin sharp slice, then blend them in software. The result is a single image where everything from the table facet to the culet is tack sharp. See the guide on focus stacking jewelry for the full workflow.
Lighting Close Up
Macro shooting compresses the working distance between the lens and the subject, which also compresses the space available for lights. A softbox that works perfectly at 50 cm shooting distance may be physically impossible to position at 10 cm.
The most practical solutions at close range are small LED panels with diffusion, a ring light placed around the lens, or a fiber optic light that can be positioned precisely. Fiber optic lights are particularly useful because the light source itself is compact enough to fit into tight angles that a panel cannot reach.
Avoid hard, direct light at macro distances. Reflections that look manageable in a standard shot become overwhelming when the lens is inches from a polished metal surface. Always diffuse the light, even if only with a piece of white tissue paper held over the source.
Watch for your own shadow. At close working distances, the camera and your hands can block the light entirely. Check the live view before every shot.
Where to Place Focus
With limited depth of field, the focus point is a deliberate decision.
For a hallmark shot, place sharpness on the stamped text. The surrounding shank can fall softly out of focus without affecting readability. For a faceted stone, focus on the facet line that shows the cut most clearly: on a round brilliant, the boundary between table and crown facets; on an emerald cut, the long center step facet. For prong and setting detail, focus on the prong tip or the bezel edge where metal meets stone, which is where buyers look first.
When to Focus Stack
Focus stacking is worth the extra effort when no single aperture can hold the full subject sharp. The most common candidates are loose gemstones photographed front to back, rings photographed at an angle spanning from the face to the back shank, and any piece where a buyer needs to read detail across a wide depth range.
For a hallmark shot or a single facet detail, one well-chosen frame at f/11 or f/16 is usually enough. Reserve stacking for situations where a single frame genuinely cannot cover the job.
Where to Go Next
For the full focus stacking workflow including gear, software, and step counts for different piece types, see the guide on focus stacking jewelry. If you are shooting diamonds and want to optimize for fire and brilliance at macro distances, the guide on how to photograph diamonds covers the lighting and background techniques that work best at close range. For the complete foundation across lighting, camera settings, and surfaces, start with the jewelry photography overview.
Frequently Asked Questions
Why are my macro jewelry shots blurry?
Usually camera shake or razor-thin depth of field. Use a tripod, a timer, a smaller aperture, and consider focus stacking.
Do I need a macro lens?
It helps a lot, but modern phone macro modes and clip-on macro lenses also produce strong close-ups.
Related guides
Keep exploring: the complete guide, gear reviews, pricing, or find a photographer.