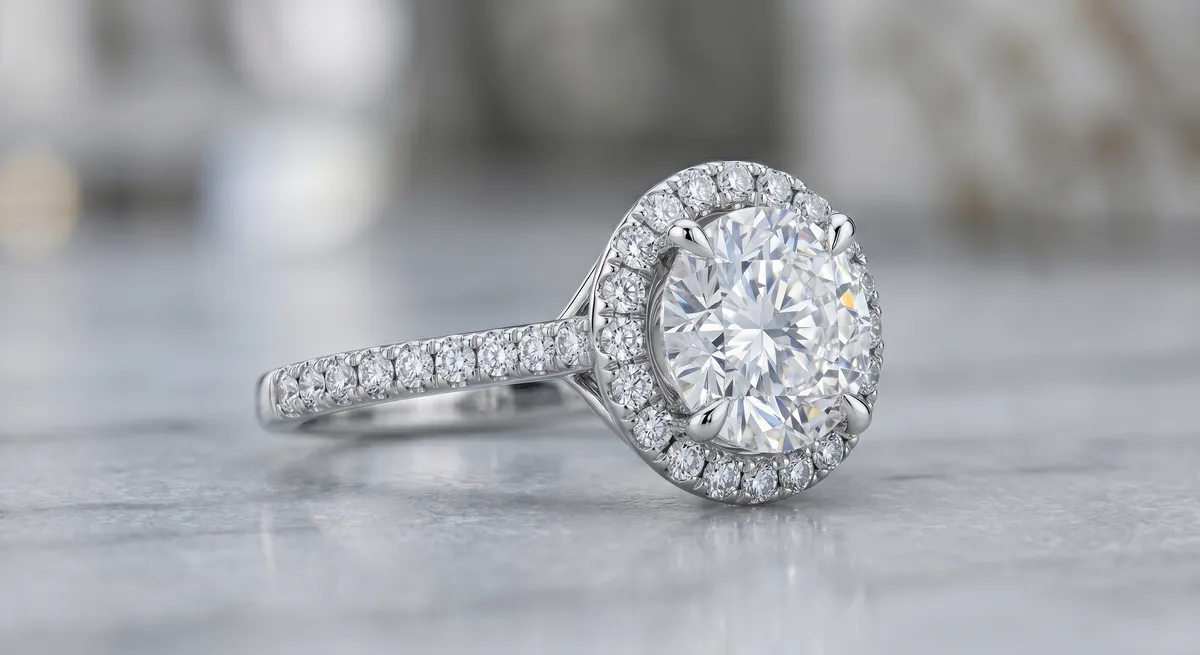
Why Depth of Field Is a Problem Up Close
The closer your camera gets to a subject, the thinner the zone that appears sharp. Photograph a ring at macro distance with a standard aperture and the depth of field can be just a few millimetres. That is usually far too shallow to cover an entire piece. A cathedral setting might have a front prong, a center stone, and a shank all sitting at different distances from the lens, each separated by more than your depth of field allows. Even stopping down to f/16 or f/22 does not fully solve it. Diffraction softens the whole image at those apertures, so you trade one kind of blur for another.
The result is a product photo where the buyer can see the accent diamonds perfectly but the center stone is a soft blur, or the hallmark stamped on the band is illegible. At professional level, that is not acceptable. Focus stacking solves the problem cleanly.
Key takeaways
- Macro shooting collapses depth of field to millimetres, leaving parts of the piece soft in any single frame
- Stopping down to f/16 or beyond causes diffraction softness that makes the whole image less crisp
- Focus stacking combines multiple frames to keep the sharpest zone from each, so the finished image is sharp front to back
- A locked-down tripod and consistent framing are essential for the software to align frames correctly
- Photoshop Auto-Blend and Helicon Focus both handle jewelry stacks well
When Stacking Is Worth the Effort
Not every jewelry shot needs a stack. A flat pendant shot straight on from above often has enough depth of field at f/8 or f/11 to cover the piece. Stacking adds time and a post-processing step, so apply it where the problem is real.
Situations where stacking earns its keep:
- Rings shot from the side, where the band curves away from the lens at both ends
- Pieces with pronounced three-dimensional structure: cluster settings, sculptural pendants, statement earrings
- Extreme macro work on small stones where the shooting distance is already very short
- Any setup where stopping down causes visible diffraction before the whole piece comes into focus
If you look at a test frame and the out-of-focus areas are distracting rather than part of the intended look, that is the signal to stack.
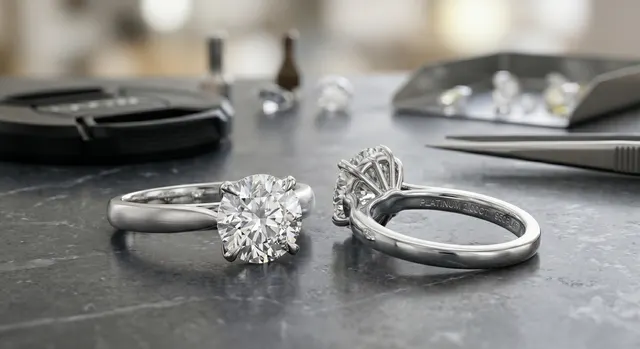
The Capture Method
Lock the camera and the piece
A focus stack only blends cleanly if every frame shows exactly the same framing with only the focal plane changing. Mount the camera on a sturdy tripod. Place the jewelry on a stable surface and do not touch either once you start shooting. Any wobble between frames creates misalignment that the software has to correct or mask, and it never recovers as cleanly as a properly locked shot.
Use a remote shutter release or your camera’s self-timer to trigger each frame without touching the camera body. Mirror lock-up (on DSLR) or electronic shutter (on mirrorless) further reduces vibration.
Shoot the focus series
Set the camera to manual exposure so nothing shifts between frames. Use Live View at maximum magnification to check each focus position before firing.
Start with focus on the nearest point of the piece, then move focus in small increments toward the farthest point, firing a frame at each position. The size of each step depends on your aperture and shooting distance. A good starting point is roughly one third of the visible depth of field per step, which means adjacent frames share overlapping zones of sharpness. That overlap is what gives the blending software clean material to work with.
For a typical ring shot, you might need 8 to 20 frames. Flatter pieces need fewer; a complex sculptural piece can need 30 or more.
Manual focus stepping works well and gives full control. Turn the focus ring in small, consistent increments. The disadvantage is that slight rotation of the focus ring can shift the image slightly, which requires the software to do more alignment work.
Motorized focus rails move the camera forward in precise, repeatable increments rather than rotating the focus ring. This eliminates focus breathing and keeps the image circle stable across all frames. Rails add cost and setup time but produce the cleanest stacks.
The Workflow
Lock down the shot
Mount the camera on a tripod. Fix the jewelry in position and do not move it during the shoot. Set manual exposure, use a remote shutter release, and check framing through Live View before starting.
Shoot the focus series
Start focus at the nearest point of the piece and step through to the farthest in small, consistent increments. Aim for overlapping zones of sharpness between adjacent frames. Fire a test burst first and check focus coverage before committing to the full sequence.
Import and align in software
Open all frames in your blending software. Run the auto-align step first. The software checks for small position shifts between frames and corrects them before blending starts.
Blend the stack
Run the auto-blend. The software identifies the sharpest region in each frame and combines them into a single composite where every zone shows its best focus. Review the result at 100% zoom.
Clean up the merge
Look for halos along high-contrast edges, ghost detail from misaligned frames, or zones where the blend chose the wrong frame. Touch these up manually using layer masks or a healing tool. The more consistent your capture was, the less cleanup is needed here.
Finish color and retouching
Apply your normal color correction, white balance refinement, and spot retouching to the merged result. Treat it like any other single file from this point forward.
Blending Software
Photoshop Auto-Blend Layers is the most accessible option. Load all frames as layers, run Edit > Auto-Align Layers, then Edit > Auto-Blend Layers with Seamless Tones and Colors checked. The result is a flattened composite with a set of masks showing which layer contributed each area. It works well on small stacks and is already in most photographers’ toolkits.
Helicon Focus is purpose-built for focus stacking and handles larger stacks more efficiently than Photoshop. It offers three blending methods: weighted average, depth map, and pyramid. The depth map method tends to produce the sharpest edges on jewelry. Helicon also supports a retouching pass where you paint to select which source frame fills a given area, which is useful for tricky zones the automatic blend gets wrong.
Zerene Stacker is another dedicated option with a loyal following among macro photographers. Its PMax mode preserves fine detail well, and its retouching tools are strong. Less common in jewelry-specific workflows than Helicon but worth trialling on complex stacks.
Pitfalls to Watch
Insufficient overlap between frames. If focus steps are too large, adjacent frames share no overlap of sharpness. The blend finds no clean source material for that zone and produces smearing or halos. Smaller steps always produce cleaner blends.
Subject or camera movement. Even a small shift mid-sequence creates alignment errors. A ring that settles by a fraction of a millimetre on its prop between frames can produce ghosting around prongs. Check for this on playback before blending.
Diffraction from stopping down too far. The instinct to stop down to f/22 to extend depth of field per frame and shoot fewer frames is understandable, but the resulting diffraction softness gives the blending software soft source material to work with. A sharper result usually comes from shooting at f/8 or f/11 with more frames than from f/22 with fewer.
Halos on high-contrast edges. Polished metal against a white background is the hardest case. The very bright specular highlight at the edge of a polished shank can bleed into the background in the merged result, leaving a faint luminous fringe. Fix these with a manual mask pass or a targeted healing brush rather than trying to re-blend.
Skipping the alignment step. Auto-Blend without Auto-Align first is a common shortcut that produces poor results. Always run alignment before blending.
For the fundamentals of shooting at close range, see the guide to macro jewelry photography. For advice on photographing complex pieces where stacking often comes up, see how to photograph diamonds. For the full context of the jewelry photography workflow, visit the jewelry photography hub.
Frequently Asked Questions
Why focus stack jewelry?
At close range depth of field is tiny, so a single frame leaves parts soft. Stacking keeps the whole piece sharp.
What software does focus stacking?
Photoshop, Helicon Focus, and several dedicated tools can blend a focus series automatically.
Related guides


Keep exploring: the complete guide, gear reviews, pricing, or find a photographer.