What Makes a Diamond Sparkle
A diamond does three distinct optical things, and each one requires something different from your lighting setup.
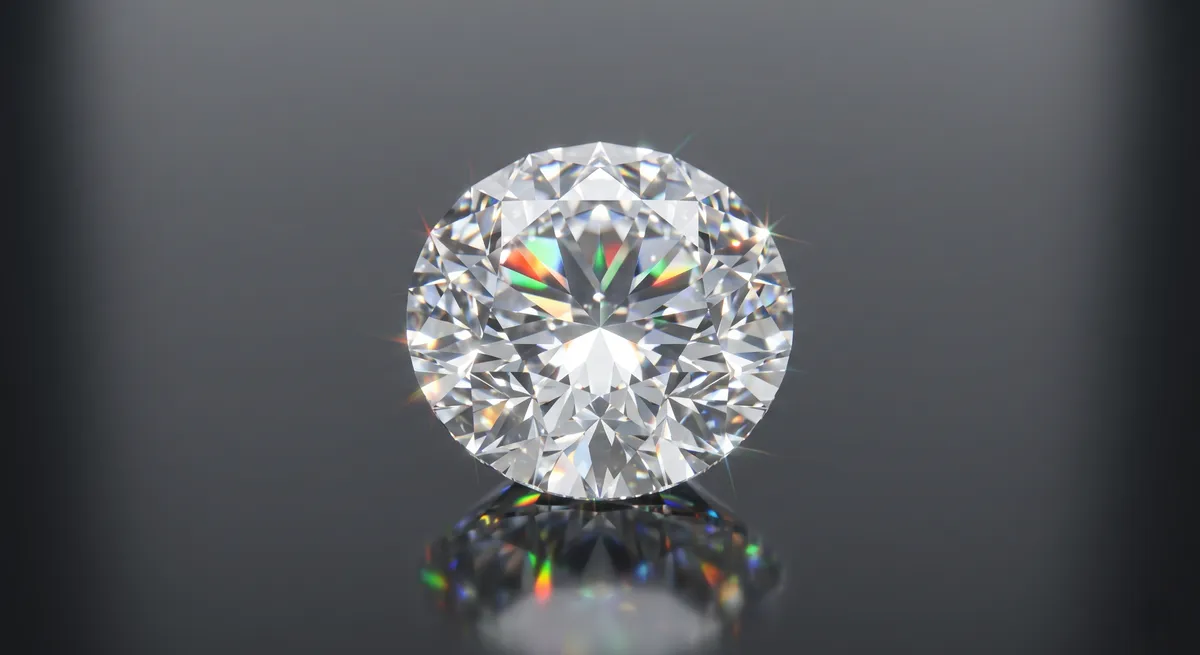
Brilliance is the white light that bounces straight back out of the crown facets toward the viewer. It is the bright, luminous quality that makes a well-cut stone look alive. Brilliance responds to soft, broad illumination - a large diffusion panel or lightbox fills the stone with even white light that exits through the table in a satisfying glow.
Fire is the dispersion of white light into spectral colors - the flashes of red, orange, and violet that flicker as the stone or camera moves. Fire appears when a small, hard light source hits the stone at an angle. Flat, diffused light kills fire entirely. You need at least one directional accent light to wake it up.
Scintillation is the on/off pattern of light and dark as the stone moves - the sparkle you see when someone waves their hand. It comes from contrast between lit and unlit facets. Without some dark area for the facets to reflect, there is nothing to contrast against, and scintillation disappears.
Understanding this trio tells you something important: you cannot optimize for all three with a single light. A good diamond shot layers a soft fill (for brilliance) with a small hard accent (for fire) against a background dark enough to give scintillation somewhere to live.
Key takeaways
- Brilliance needs soft, broad light; fire needs a hard directional accent; scintillation needs contrast with dark areas
- Clean the stone completely before every shot - dust and oil kill sparkle at macro distances
- A black or dark-field background shows fire and scintillation far better than white
- Focus stack loose stones so the whole depth of the pavilion is sharp
Clean the Stone First
Nothing kills sparkle faster than a fingerprint or a dust particle sitting on a facet. At the distances you shoot a diamond - often 1:1 macro or beyond - a smear of skin oil becomes a foggy wash across half the table. A speck of lint becomes a boulder.
Before placing the stone, hold it with tweezers or cotton gloves only. Then:
- Use a rubber air blower to clear loose dust.
- Wipe the stone with a lint-free microfiber cloth using a single stroke - do not rub back and forth.
- Blow again after wiping.
- Check under a loupe or in live view at full magnification before committing to a shot.
Repeat this ritual between every repositioning. The stone picks up oil from the holder and dust from the air continuously.
Lighting: Soft Fill Plus Hard Accent
The lighting formula for diamonds is two-stage.
Stage 1 - soft fill. Start with a large diffusion source: a softbox at least 60 cm wide, a diffusion panel, or a light tent. Position it above and slightly in front of the stone. This gives you the broad, even illumination that drives brilliance - the stone will look bright and white.
Stage 2 - hard accent. Add a second, small light with no diffusion, or use a snoot or grid to narrow the beam. A fiber optic light or a small LED flashlight on a stand both work. Aim it at a low angle from the front or side, so it rakes across the crown facets. Watch in live view as you move it - at the right angle the fire appears suddenly, flashing orange and blue across the pavilion. Lock that position.
The ratio matters. The accent should be noticeably weaker than the fill, roughly 1/3 to 1/2 the intensity. If the accent is too strong it creates harsh hot spots that blow out the table and eliminate the very detail you want.
Large softbox
Drives brilliance. Position above the stone and at least 60 cm wide for even, gradual fill across the crown.Small hard accent
Ignites fire and scintillation. A snoot, grid, or fiber optic light aimed at a low raking angle.Black flag cards
Place opposite the accent light to deepen shadow areas, giving scintillation contrast to read against.White fill card
Optional bounce opposite the softbox to lift shadow detail without flattening the sparkle pattern.Dark-Field and Black Background Technique
The single biggest change most photographers can make immediately is switching from a white background to a black one. On white, the brilliant white light bouncing out of the stone blends into the background - the contrast disappears and the stone looks flat. On black, every flash of fire and every scintillation point reads against pure darkness.
Black velvet is ideal because the fibers trap light and produce a truly non-reflective surface. Matte black paper is a close second. Avoid glossy black surfaces - they reflect the stone and create a distracting mirror image below it.
Dark-field lighting takes this further. In a dark-field setup, the light source is positioned so it does not illuminate the background at all - it only strikes the stone from below or at a very oblique angle. The result is a stone that appears to float on pure black, glowing from within with fire and color. Gemologists use this technique with specialized stands; for photography, you can approximate it by suspending the stone over a black base with a thin acrylic rod or a small amount of museum putty, and directing your accent light up through the base.
Polarizing Filter to Cut Surface Glare
A polished diamond facet is a flat mirror. At certain angles, that flat surface reflects the light source as a featureless white patch - no detail, no color, just a blown-out hot spot. A circular polarizing filter (CPL) on the lens, combined with polarizing film placed over the light source, lets you dial out those surface reflections independently of the light intensity.
This cross-polarization technique works because light becomes polarized after passing through the film, and the CPL blocks it when rotated 90 degrees to the film’s axis. Rotate the CPL slowly in live view while watching the facets - the surface glare will drop away, revealing the internal refraction and fire inside the stone.
The cost is roughly 1.5 to 2 stops of light. Compensate by opening the aperture slightly (be careful not to lose depth of field) or by slowing the shutter speed if the stone is completely still on a stand.
Magnification and Focus Stacking
Diamonds are small. A 1-carat round brilliant is about 6.5 mm in diameter. To fill a frame and show facet detail, you need macro reproduction ratios of 1:1 or greater, which means a macro lens, extension tubes, or a dedicated macro bellows.
At those distances, depth of field collapses to a millimeter or less. Stopping down to f/11 or f/16 helps, but diffraction softens the image at very small apertures, and the pavilion of a round brilliant is still too deep to capture sharp front to back in a single frame.
Focus stacking is the solution. Shoot a series of frames - typically 8 to 20 for a round brilliant - each focused a tiny step deeper into the stone. Stack them in Helicon Focus, Zerene Stacker, or Photoshop’s auto-blend layers. The result is a composite where every facet is tack-sharp from the table down through the culet.
Use a focusing rail for precise incremental movement rather than rotating the focus ring, which also changes magnification slightly and makes alignment harder in the stacking software.
Mount the camera on a rigid tripod or copy stand
Any vibration between frames creates misalignment in the stack. Mirror lockup or electronic shutter eliminates camera shake at the moment of capture.
Attach a focusing rail to the tripod head
Turn the rail knob to shift the camera forward in small increments - 0.2 to 0.5 mm per frame works well for most diamonds at 1:1 macro.
Shoot the full stack without moving the stone or lights
Start focused on the table facet (closest to the lens) and work rearward through the pavilion to the culet. Keep intervals consistent.
Import and stack in focus stacking software
Helicon Focus and Zerene Stacker both handle curved facet geometry well. Review the depth map for missed layers and reshoot if gaps appear.
Loose Stones vs Set Stones
Loose diamonds give you complete optical access to every facet, including the pavilion. The challenge is holding them. Options:
- Tweezers with rubberized tips for repositioning between shots
- A small ball of museum wax or jeweler’s putty pressed into a ring stand, with the girdle resting in the wax - nearly invisible if kept small
- A thin acrylic rod with the culet resting in a drilled dimple, useful for suspended dark-field shots
Retouching the holder out in post is straightforward at macro scale.
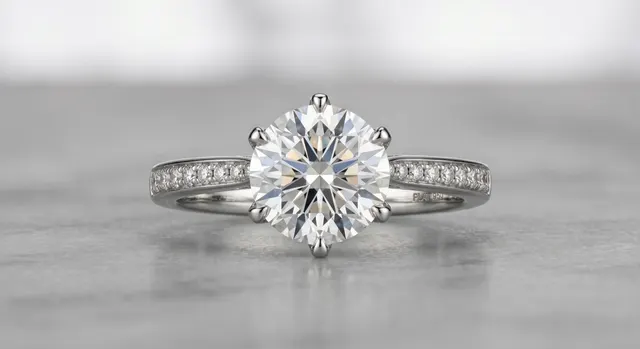
Set stones - diamonds in rings, pendants, or earrings - introduce the metal setting as a reflective surface that competes with the stone. The metal needs its own lighting attention. Generally:
- The soft fill that drives brilliance in the diamond also illuminates the metal, which is helpful
- The hard accent that creates fire in the stone may create harsh glare on the prongs - use flag cards to redirect or block that accent from hitting flat metal surfaces
- Cross-polarization is more useful for set stones because you can target metal glare independently of the stone’s fire
For a full breakdown of shooting diamond rings specifically, see the guide on how to photograph a diamond ring.
Where to Go Next
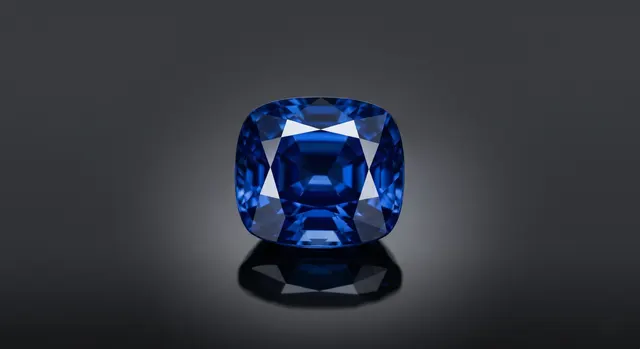
These techniques connect to broader skills across jewelry photography. For other colored gemstones that require a different approach to fire and saturation, see how to photograph gemstones. For the full workflow covering lighting, surfaces, and camera settings for any jewelry piece, the jewelry photography overview is the starting point.
Frequently Asked Questions
Why do my diamonds look dull in photos?
Usually too much flat, even light. Diamonds need some directional or hard light to spark the facets, plus a clean stone.
What background shows diamonds best?
Black or dark-field backgrounds maximize contrast so fire and sparkle read clearly; white works for clean ecommerce looks.
Related guides
How to Photograph a Diamond Ring
How to Photograph Gemstones

How to Eliminate Glare & Reflections on Jewelry
Keep exploring: the complete guide, gear reviews, pricing, or find a photographer.