Why Color Accuracy Is the Whole Job
A sapphire is not blue in some approximate way. It is a specific blue that shifts toward violet in daylight, warms slightly under tungsten, and opens into a different depth under direct sun. When a buyer sees your photo and then holds the stone, those two colors need to match. If they do not, trust breaks and returns follow.
Color accuracy for gemstones is harder than for metal because stone color is caused by light interacting with the interior of the material, not a surface coating. The camera sees the stone through however many layers of light quality, white balance choices, and environmental color casts sit between the sensor and the gem. Getting each of those layers right is what separates a photograph that sells from one that misleads.
Key takeaways
- Set white balance from a gray card, not camera presets, so the stone’s hue is true to life.
- Use CRI 95 or higher light to avoid muddy or shifted gemstone colors.
- Add backlight or side light so transparent and translucent stones reveal their inner color.
- Diffuse your main light to keep facets clean without blown-out hotspots.
- Move in close with a macro lens to show inclusions and the character buyers actually care about.
White Balance With a Gray Card
Your camera’s auto white balance is designed for general scenes. It will look at a deep ruby and try to neutralize the color cast it perceives, which means it partially strips the red you are trying to show. The fix is a gray card.
Before your first shot of any session, place an 18% gray card in the same light that will hit the stone. Shoot it, then use that frame to set a custom white balance in-camera or as your reference point in Lightroom or Capture One. From that point forward, every shot in that lighting is anchored to neutral gray, and the stone’s color appears exactly as the light renders it.
Match your color temperature to a single source and hold it there. Mixing a 3200 K continuous light with 5500 K daylight spilling from a window produces a color rendering no gray card can fully fix, because the stone and the background are being lit by two different color temperatures at once. Close the blinds or turn off the room light before you shoot.
CRI matters as much as color temperature. A light rated CRI 85 drops certain wavelengths that contribute to saturated greens and reds. An emerald lit with a CRI 85 source looks muted regardless of white balance. Use CRI 95 or higher for any gemstone work.
Avoiding Color Casts From the Environment
Colored surfaces near the stone act as secondary light sources. A red velvet display tray bounces red light back into a white diamond. A green plant at the edge of the frame pushes a green cast into a pale aquamarine. Even your own clothing reflects onto a polished pavilion if you lean too close.
Shoot on a neutral gray or matte white surface whenever the final image will be on a white background. If you need a dark or colored background for the finished shot, keep the background far enough behind the stone that it does not reflect upward into the piece. Black velvet is safe because it absorbs rather than bounces.
Scan the piece in live view while looking specifically for color contamination, not just brightness. Zoom into the stone on the live view screen and look at the shadow areas inside the facets. That is where color casts hide before they become obvious in a full-frame view.
Lighting Transparent and Translucent Stones
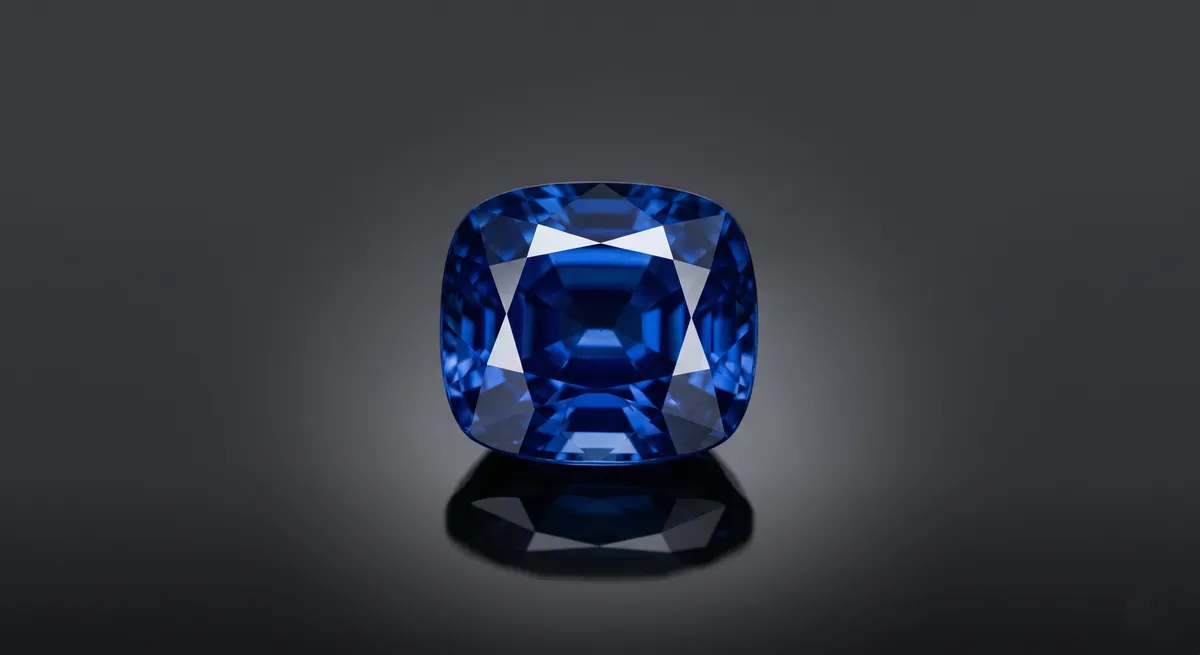
This is the biggest difference between gemstone photography and metal photography. Metal is opaque; light bounces off the surface. A transparent gem such as a sapphire, aquamarine, or tourmaline also lets light pass through it, and that transmitted light is where the richness of the color lives.
A single softbox from the front gives you a bright facet but a dark interior. The stone looks flat and potentially dead. To show the internal color, you need light coming from behind or beside the stone.
Place a backlight behind the stone
Set a small diffused LED or a light panel directly behind and below the stone, pointing upward through the surface the stone rests on. A translucent acrylic shooting table works perfectly for this. The interior of the stone lights up and the color becomes fully visible.
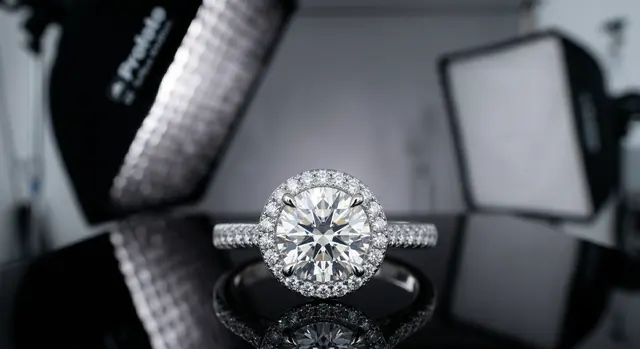
Try side lighting for colored gemstones in settings
When the stone is set in metal and a backlight is not practical, bring a narrow light source in from the side at roughly the height of the stone’s girdle. This rakes light through the pavilion facets at an angle that transmits color without overwhelming the metal surround.
Balance front light to control surface reflections
Once backlight or side light is in place, add a diffused main light from the front at a low ratio compared to the transmitted light. The front light defines the table facet and top crown, while the transmitted light carries the color. Too much front light overpowers the interior glow.
Opaque stones such as turquoise, malachite, or onyx do not transmit light, so the backlight approach does not apply. For these, a single large diffused source from above or at a shallow angle across the surface brings out texture and pattern, which is where the visual interest lives.
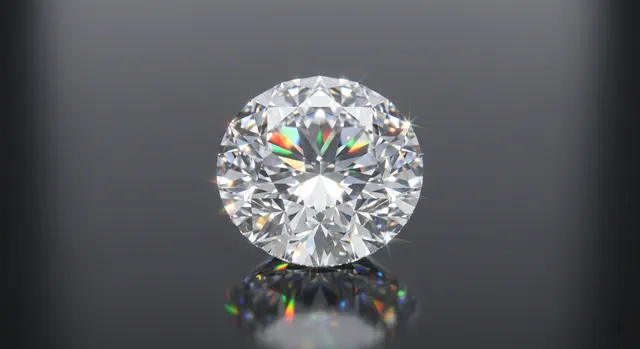
Diffusion and the Facet Problem
Faceted gemstones are optical systems. Every flat facet is a small mirror that reflects whatever is in front of it at the corresponding angle. Point a bare LED at a diamond and each table facet and bezel facet reflects a tiny bright source, creating a chaotic pattern of hotspots. Add a large diffusion panel and each facet reflects a broad, soft gradient instead of a point, which reads as sparkle rather than glare.
Large softbox (60 cm or wider)
The default modifier for most gemstone work. Place it above and slightly to the front for a clean table reflection without blown-out highlights.
Diffusion panel or light tent
Ideal for highly faceted stones where you need even illumination across all crown facets simultaneously.
White reflector card
Fill light under the girdle to open shadow areas inside the pavilion without adding a second visible reflection source.
Black flag
Creates a crisp dark reflection at the edge of the stone that reads as depth and dimension against the bright facets.
Shooting Macro for Inclusions and Character
Natural gemstones have inclusions, growth patterns, color zoning, and surface textures that set them apart from synthetic alternatives. These details are selling points for fine jewelry buyers and collectors. A full-frame shot of a ring does not show them. A macro shot does.
Move in close with a dedicated macro lens or a lens with close-focus capability. A 100 mm macro at 1:1 or 1:2 reproduction fills the frame with a stone that is 5 to 10 mm across. At that scale, a silk inclusion in a ruby or a garden of mineral crystals inside a phantom quartz becomes a visible feature of the photograph.
Use a narrow aperture (f/11 to f/16) and focus stack if the stone has significant depth, because depth of field at 1:1 magnification is measured in fractions of a millimeter. A focus-stacked macro composite of a fine sapphire that shows color zoning from girdle to table is a significantly more compelling product image than a sharp but small frame.
Putting It Together
The workflow for any colored gemstone session is the same: set white balance from a gray card first, control the room for color casts, add transmitted light before front light, diffuse everything, then move in close to capture character.
For diamond-specific lighting and the unique challenge of showing brilliance and fire in a colorless stone, see the guide on how to photograph diamonds. For techniques to eliminate unwanted reflections in metal settings, see control reflections in jewelry photography. For an overview of the full jewelry photography workflow, visit the jewelry photography guide.
Frequently Asked Questions
How do I get accurate gemstone color in photos?
Shoot a gray card to set white balance, use high-CRI light, and avoid colored surfaces nearby that cast a tint on the stone.
How do I show a transparent gemstone's color?
Add backlight or a light source behind or beside the stone so light passes through and reveals the internal color.
Related guides
How to Photograph Diamonds
Jewelry Photography Lighting Setup

How to Eliminate Glare & Reflections on Jewelry
Keep exploring: the complete guide, gear reviews, pricing, or find a photographer.