A diamond ring is the most demanding subject in jewelry photography. The metal band mirrors the entire room, the setting holds tiny prongs that disappear under harsh light, and the stone itself can either blaze with life or read as a dull chip depending on one or two degrees of angle. Get the fundamentals right and the results are immediately professional.
Key takeaways
- Clean the ring before every shot; fingerprints and dust are magnified at macro distances
- Stand the ring upright on white acrylic with museum wax to show band and stone together
- Diffuse every light source so the metal has smooth gradients, not blinding hot spots
- Shoot at f/8 to f/16 and consider focus stacking at very close distances
- Photograph on both white and black backgrounds so you have options for every use case
Cleaning and Preparing the Ring
The camera sees more than you do. A fingerprint invisible to the naked eye becomes a greasy smear at macro scale, and a single fiber of dust reads as a log across the stone. Cleaning takes two minutes and saves thirty minutes of retouching.
Use a blower bulb first to remove loose particles without touching the surface. Follow with a microfiber cloth lightly dampened with lens-cleaning solution. For the prongs and the underside of the setting, a soft-bristle brush (a clean toothbrush or a dedicated jewelry brush) reaches where cloth cannot. Finish with another pass of the blower to lift anything the cloth disturbed.
Handle the ring only at the band, using cotton gloves, from this point forward. Keep gloves on throughout the session.
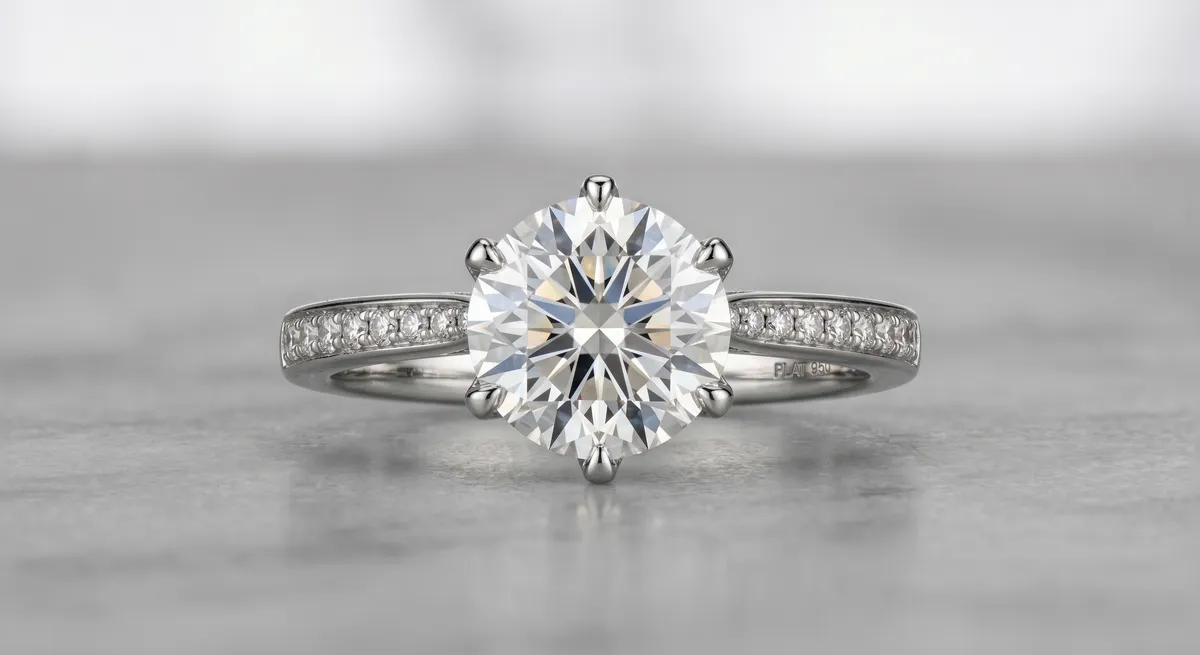
Standing the Ring Upright
Laying a ring flat on a surface hides the profile of the setting and makes most stones look small. The classic technique is to stand the ring on edge so the viewer sees both the band curving away and the stone facing forward, as if someone were about to slide it on.
Museum wax (also sold as Blu Tack or poster putty) is the standard tool. Press a very small amount, about the size of a pea, onto a sheet of white acrylic. Stand the ring in the wax and tilt it slightly toward the camera, perhaps five to ten degrees, so the stone faces forward without the top of the band occluding the setting. The acrylic surface reflects a gentle luminous glow upward into the underside of the band, which helps fill shadow without any additional light.
Experiment with the angle until the widest part of the setting is visible and the band shows its full profile on at least one side. That combination communicates both the stone size and the craftsmanship of the metal.
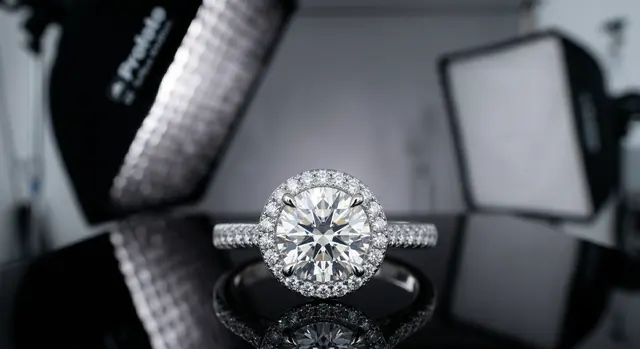
Lighting for Sparkle Without Blowout
A diamond is both a mirror and a prism. It picks up reflections the same way polished metal does, but it also refracts light and scatters it as colored fire. The goal is to capture both: a clean specular highlight that tells the viewer the stone is brilliant, plus visible internal dispersion.
Place a large softbox (at least 60 x 60 cm) at roughly 45 degrees above and to one side of the ring. This angle wraps the band in a smooth gradient and catches the stone’s facets without turning them white. A second softbox or white reflector card on the opposite side at lower output opens up the shadow side of the band.
Keep the light source large relative to the ring. A small, hard source will produce a single blinding point in the stone’s table facet and harsh hot spots on the band. The stone needs room to spread its sparkle across multiple facets, not concentrate it in one burned-out spot.
Controlling Reflections on the Band
The band of an engagement ring is a curved mirror. Whatever surrounds it, from ceiling tiles to your shirt, will appear as reflections. Control this before shooting rather than fixing it in post.
Place a black card just out of frame on the opposite side from the key light. This creates a crisp dark stripe along the band edge, which the eye reads as depth and polish. Without it the band can look uniformly bright and tubular. A second white card underneath the ring, angled toward the camera, fills the underside of the setting and prevents it from going to black silhouette.
For the prong setting specifically, watch for reflections that obscure individual prongs. A small flag moved incrementally can separate each prong from the background, making the craftsmanship legible. Take a frame, review at 100 percent, adjust a few millimeters, repeat.
For a complete guide to this technique, see controlling reflections in jewelry photography.
Macro, Aperture, and Focus Stacking
A ring fills only a small area of a full-frame sensor at typical tabletop distances. To fill the frame properly, a macro lens or close-up adapter is necessary. A 100 mm macro lens gives comfortable working distance without the lens barrel blocking your light.
Aperture for rings is typically f/8 to f/16. At f/8 the depth of field at macro distances is razor thin, often less than a millimeter, which means the near prongs may be sharp while the far side of the band blurs into softness. At f/16 more of the ring stays in focus, though diffraction begins to soften fine detail at the very small end of that range. f/11 is a reliable starting point.
When the whole ring must be sharp, from the front of the stone to the far curve of the band, focus stacking is the solution. Shoot a series of frames, shifting the focus plane slightly between each one, then merge them in Photoshop (Edit > Auto-Blend Layers > Stack Images) or dedicated software such as Helicon Focus or Zerene Stacker. A macro rail makes the focus shifts repeatable and consistent.
White vs Black Background
Both backgrounds work for a diamond ring and serve different purposes.
White reads as clean, bright, and ecommerce-ready. It matches the presentation style of most online jewelers and integrates easily into product pages. Light the background separately with a third light or by bouncing your main light off a white sweep beneath the ring. Keep the background one to two stops brighter than the ring to hold a clean 255 white without spill fogging the stone.
Black adds drama and contrast. Against a dark field, the diamond’s fire is more visible and the metal glows. Black velvet is the preferred material because it absorbs rather than scatters light, holding deep shadow without hotspots. No additional light on the background at all; the goal is to deprive it of illumination entirely.
Shoot both if time allows. White works for the product listing, black works for social media and editorial use.
What You Will Need
Macro lens (90-105 mm)
Fills the frame at comfortable working distance and keeps the light path clear.Museum wax and white acrylic
Holds the ring upright and provides a soft upward fill reflection at no cost.Large softbox (60 cm or bigger)
Wraps the band in smooth gradients and lets the stone sparkle without blowing out.Black and white flag cards
Shape what the band mirrors; the black stripe separates prongs and reads as polished depth.Cotton gloves and blower bulb
Keeps the ring clean between shots so no print or dust appears at 100 percent zoom.Macro rail (optional)
Makes focus stacking shifts precise and repeatable when the whole ring must be sharp.Core Shooting Sequence
Clean and glove up
Blower, brush, microfiber cloth. Put on cotton gloves before touching the ring again.
Mount the ring
Press museum wax onto white acrylic, stand the ring upright, tilt five to ten degrees toward the camera until the setting faces forward.
Dial in the lights
Key softbox at 45 degrees above and to one side, fill card or second softbox at lower output opposite. Add black flag on the far side of the band.
Find the fire
Rotate the ring slowly in live view until two or three facets catch inner light. Lock position with the wax.
Set aperture and focus
Start at f/11, focus on the center stone, shoot a test frame and check at 100 percent. If the band falls soft, stop down or plan a focus stack.
Shoot multiple angles
Front facing, three-quarter left, three-quarter right, top-down flat-lay, and profile. Review each on the back of the camera or tethered before moving on.
Quick Shot Checklist
- Ring cleaned, no fingerprints or dust visible at 100 percent
- Ring standing upright on white acrylic, stone facing camera
- Softbox large enough, positioned at 45 degrees above and to side
- Black flag creating a defined dark stripe on the far band edge
- White fill card open on the shadow side
- Aperture at f/8 to f/16, focus on center stone confirmed sharp
- Focus stack planned if full ring depth is required
- Shot on white background and on black background
- Multiple angles captured: front, three-quarter left, three-quarter right, profile, top-down
For more on keeping polished metal clean of unwanted reflections, see the full guide on controlling reflections in jewelry photography. For lighting setup details that apply across all jewelry types, the jewelry photography lighting guide covers softbox placement, modifiers, and background lighting in depth. The jewelry photography overview ties the full workflow together from cleaning the bench to final export.
Frequently Asked Questions
What aperture is best for a diamond ring?
Around f/8 to f/16 gives enough depth of field to keep the band and stone sharp; very close macro may need focus stacking.
White or black background for a diamond ring?
White keeps it clean and ecommerce-ready; black adds drama and makes the diamond pop. Shoot both when you can.
Related guides

How to Eliminate Glare & Reflections on Jewelry
Jewelry Photography Lighting Setup

How to Photograph Diamonds
Keep exploring: the complete guide, gear reviews, pricing, or find a photographer.