Key takeaways
- Clean every surface before you shoot; dust and fingerprints read at macro distances as obvious smudges.
- Museum wax on white acrylic is the fastest, cheapest way to stand a ring upright at a controlled angle.
- Diffuse your light source and use black and white flag cards to shape the reflections on the band.
- Cover at least four angles per ring: hero three-quarter, top-down, profile, and inside-band detail.
Prep and Cleaning
Nothing derails a ring shoot faster than a fingerprint you notice only after reviewing the file at 100 percent. Polish and curved metal act like a lens, concentrating every mark and particle into a visible smear.
Before you touch the ring for placement, run through this short prep:
- Blow away loose dust with a bulb blower, starting with the inside of the band where particles collect.
- Wipe the band and setting with a lint-free microfiber cloth or a clean cotton glove.
- Check the stone or bezel under a desk lamp at a raking angle; re-wipe if you spot any haze.
- From this point forward, handle the ring only with cotton gloves or tweezers. A bare finger on polished gold leaves an oil print that a softbox will find immediately.
Keep a polishing cloth within arm’s reach. If you need to reposition the ring during the shoot, wipe again before the next shot.
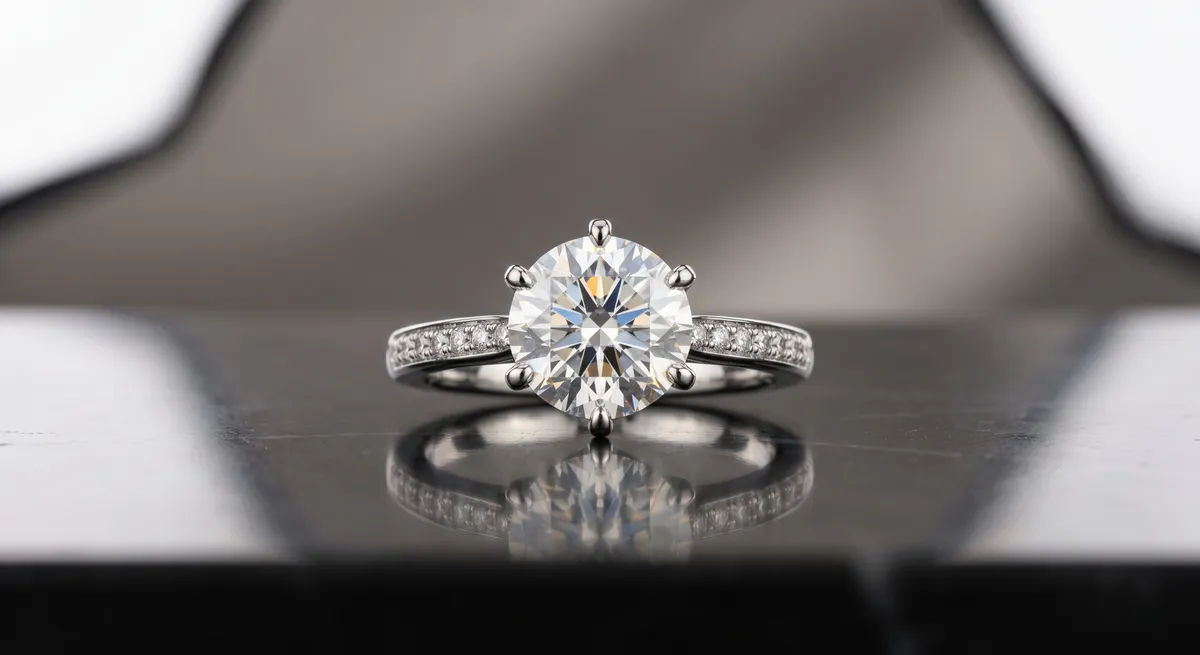
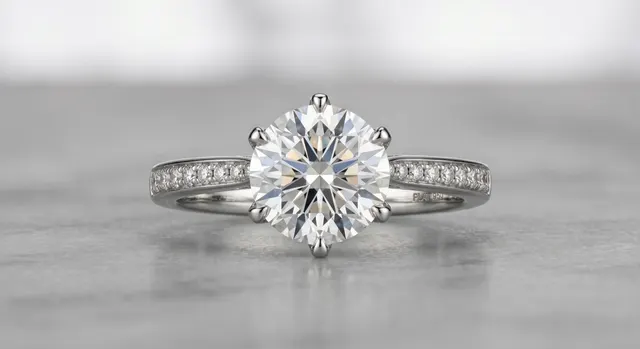
Standing the Ring Upright
Lying a ring flat on a surface shows the inside of the band and hides the setting. Standing it upright at a slight angle is almost always the better choice for hero and listing shots.
What you need: a small dab of museum wax (sometimes sold as Quake Wax or Blu Tack) and a sheet of white acrylic.
Place the acrylic on your shooting surface
White acrylic reflects a gentle fill light back up toward the underside of the ring and gives you a clean, neutral base that works on both white and gradient backgrounds.
Press a tiny wax ball onto the acrylic
Use no more than a pea-sized piece. Press it flat so the ring base has a stable seat. Too much wax creeps up the band and shows in close-up shots.
Set the ring at a slight angle
Lean the ring about 10 to 15 degrees back from vertical. This shows the top of the setting without collapsing the band silhouette into a flat line. Adjust until both the band curve and the stone are visible in your viewfinder.
Confirm the wax is invisible from camera position
Crouch to shooting height and check live view. Reposition or trim the wax if any shows at the base of the ring.
For very light rings that tip easily, a second pin of wax at a different point on the band base adds stability without adding visibility.
Lighting and Reflection Control on the Band
Polished metal sees its whole environment. Aim the wrong light at a gold band and you get a blown-out stripe that erases all texture; leave the shadow side alone and the ring looks flat.
The goal is a controlled gradient from highlight to shadow with one clean specular stripe running along the top edge of the band. That stripe tells the viewer the metal is polished. Everything else should be smooth.
Start with a large softbox. Position it at roughly 45 degrees to the side and 45 degrees above the ring. A softbox at least 60 cm on its shortest side wraps around the curved band without a harsh terminator line.
Add a black flag on the opposite side. A small piece of black foam core placed just out of frame, opposite the softbox, creates a dark edge reflection in the band that reads as depth and dimension. Move it a centimeter at a time while watching live view.
Add a white fill card below or in front. The acrylic sheet already bounces a little light back up; supplement it with a small white card angled toward the shadowed face of the band if the inside curve goes too dark.
For highly polished metal where every reflection is a problem, see the full guide on controlling reflections in jewelry photography.
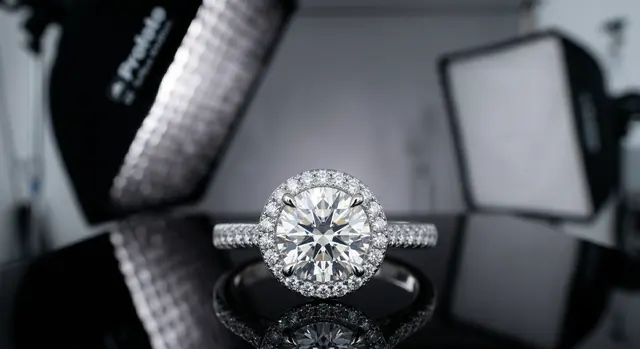
Macro Angles and Detail Shots
A single image cannot do a ring justice. Buyers and clients want to see the band shape, the setting height, how the stone sits, and whether the inside of the band has a hallmark or texture. Plan for at least four distinct captures.
Three-quarter hero
The primary listing shot. Camera at slight elevation, ring angled back 10 to 15 degrees. Shows the band curve, the setting, and the stone in one frame. Fill about 70 percent of the frame with the ring.
Top-down
Camera directly overhead, ring flat or standing. Shows the full top of the setting, symmetry of prongs or bezel, and the face of the stone. Good for catalogue and social use.
Profile or side
Camera at band level, shooting across the diameter of the ring. Shows the setting height, the profile of the stone above the band, and the thickness of the shank. Essential for engagement rings.
Inside-band detail
Flip the ring or angle it so the camera looks into the interior. Captures hallmarks, engravings, or the finish of the inside shank. Buyers who size rings by hallmark need this shot.
Setting close-up
Move as close as your lens allows and focus on the prongs, bezel, or pave work. A macro lens or extension tube reveals craftsmanship detail that a standard shot flattens out.
Stone face
Frame just the table of the stone or the top of the cabochon, lit to show color saturation and clarity. Use live view to confirm the focal plane sits exactly on the stone’s table facet.
For each angle, take a minimum of three frames and review sharpness at 100 percent before you move on. Focus at macro distances is shallow; a shift of a millimeter changes which part of the ring is sharp.
Backgrounds
White and off-white acrylic sweeps are the standard for e-commerce: they keep the focus on the ring and retouch to pure white with little effort in post. For lifestyle or campaign images, a few alternatives work well.
- Matte gray tile or slate reads as contemporary and contrasts well with both gold and silver without introducing a color cast.
- Velvet or suede fabric in charcoal or deep navy adds richness and absorbs light so the ring’s highlights stand out. Keep it free of lint before every shot.
- Natural materials such as marble offcuts, unfinished wood, or concrete blocks suggest the ring’s context without competing with it. Keep texture subtle so the eye lands on the ring, not the surface.
Avoid busy, patterned, or brightly colored backgrounds for primary listing shots. They create visual noise that competing platforms and search thumbnails strip out anyway.
Shot List at a Glance
Before you move the ring and strike the light, confirm you have captured:
- Hero three-quarter angle, ring upright, full band and setting visible
- Top-down overhead, setting centred in frame
- Side profile showing setting height and shank thickness
- Inside-band detail for hallmark or engraving
- Setting close-up showing prong or bezel craftsmanship
- Stone face showing color and clarity (if the ring has a stone)
Six captures, reviewed at 100 percent, give a complete picture of the ring from every angle a buyer or insurer needs to see.
For diamond-specific techniques including controlling facet glare and boosting brilliance, see the guide on how to photograph a diamond ring. For lighting setups that cover all jewelry types, see controlling reflections in jewelry photography. The jewelry photography overview covers the full workflow from surface selection through export.
Frequently Asked Questions
How do I stand a ring up for photos?
A small dab of museum wax or putty on a sheet of white acrylic or glass holds the ring upright at a controlled angle and stays out of frame.
What angle is best for ring photos?
A slight three-quarter angle usually shows the band shape and the top of the ring at once, which reads better than a flat straight-on shot.
Related guides
How to Photograph a Diamond Ring

How to Eliminate Glare & Reflections on Jewelry
Jewelry Photography Lighting Setup
Keep exploring: the complete guide, gear reviews, pricing, or find a photographer.