Key takeaways
- Auto white balance guesses, and it usually guesses wrong on jewelry, shifting silver blue and gold green
- A single gray card shot fixes white balance at the source before you take a single product frame
- Gold needs to read warm, silver needs to read neutral, and the camera cannot determine that on its own
- Mixed light sources create color that no white balance setting can fully resolve, so match your sources first
- Locking white balance once and applying it to the whole batch saves far more time than correcting each frame individually
Why Color Goes Wrong
Jewelry is one of the hardest subjects to color-accurately photograph, not because cameras are bad at color, but because color error compounds from multiple directions at once.
Auto white balance is calibrated for averages. The algorithm reads the whole frame, finds the average color temperature, and tries to neutralize it toward daylight. A warm gold ring in the center of the frame pushes the algorithm to cool the image. The result is a piece that looks pale, greenish, or stripped of the warmth that makes yellow gold look like yellow gold. Silver suffers the opposite problem: a cooler ambient environment pushes the camera to warm the image slightly, and the neutral metal picks up a faint yellow or orange tint.
Color casts from nearby surfaces. Metal is reflective. Whatever surrounds the jewelry during a shoot gets reflected into the surface of the piece itself. A green-tinted backdrop, a colored prop, a wall with warm paint, even a colored piece of clothing visible in the studio: all of these bleed onto the metal. White balance correction in post cannot remove a cast that is physically embedded in the reflections. It has to be fixed at the source.
Mixed light. Shooting near a window while also running a studio light of a different color temperature creates two competing white points in the same frame. The camera picks one to balance to, and the other becomes a cast. Areas lit by the window look cooler; areas lit by the studio light look warmer. No single white balance value corrects both simultaneously.
Auto white balance shift
The camera cools warm metals and warms cool metals, moving both silver and gold away from their natural tones.Reflected color cast
Metal mirrors its surroundings. A colored backdrop or prop bakes a tint directly into the surface, beyond what white balance can fix.Mixed light sources
A window and a studio light at different color temperatures create two white points in one frame. One will always read wrong.Low-CRI light
Sources rated below CRI 95 drop specific wavelengths, which distorts warm metals especially and makes sliders in editing less effective.The Gray Card Method
An 18 percent gray card is a target printed to reflect exactly 18 percent of the light that hits it, with no color bias. When you photograph one under your shoot lights, the camera captures a frame of perfectly neutral midtone. That frame becomes the reference for a white balance that is calibrated to your actual light, not the camera’s guess.
The process is straightforward. Before you place the first piece, set the gray card where the jewelry will sit. Take one frame under your shoot lights with the card filling most of the frame. In-camera white balance menus have a custom or manual option that lets you select that frame as the reference. Every shot after that is balanced to your specific light.
Shoot raw regardless. Raw files record the full color information so that white balance can be adjusted non-destructively after the fact. JPEG white balance is baked into the file at capture and is much harder to correct later, particularly on metals where the warm or cool channels are already compressed.
Custom White Balance in Camera vs Fixing in Raw
Both approaches work, and neither is universally superior. The right choice depends on how you work.
Setting it in camera means your live view and every JPEG preview on the back of the camera shows accurate color from the first frame. You can judge exposure and reflections in real time without the mental adjustment of knowing everything looks a bit off. It is faster when you are doing a one-product shoot or working with a client present.
Correcting in raw is more flexible. Shoot with a preset color temperature, keep a gray card frame at the start of each lighting setup, and then use the white balance picker in Lightroom or Capture One to sample that frame. Copy-paste that correction across the entire batch in one step. If the light shifts, shoot another gray card frame and apply the corrected value from that point forward. This approach is efficient for large batches and gives you a clear record of what white balance was used for each lighting setup.
Checking Metal Tones
Once white balance is set, verify it against the metals themselves before shooting the full batch.
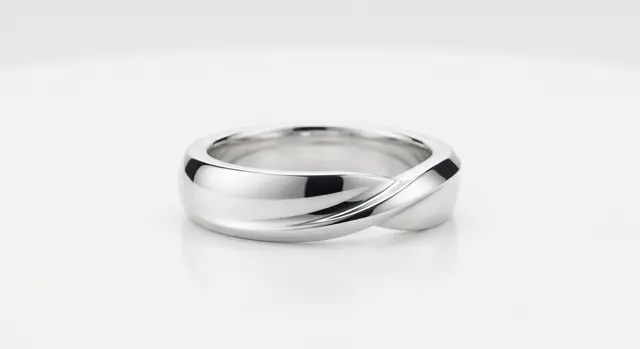
Silver should read as a clean neutral. If the metal has a blue tint, the white balance is still too cool. If it looks slightly yellow or warm, it is running too warm. A polished silver surface with accurate white balance reflects a clean gradient from bright white at the highlight to a neutral mid-gray in the shadows, with no color in either zone.
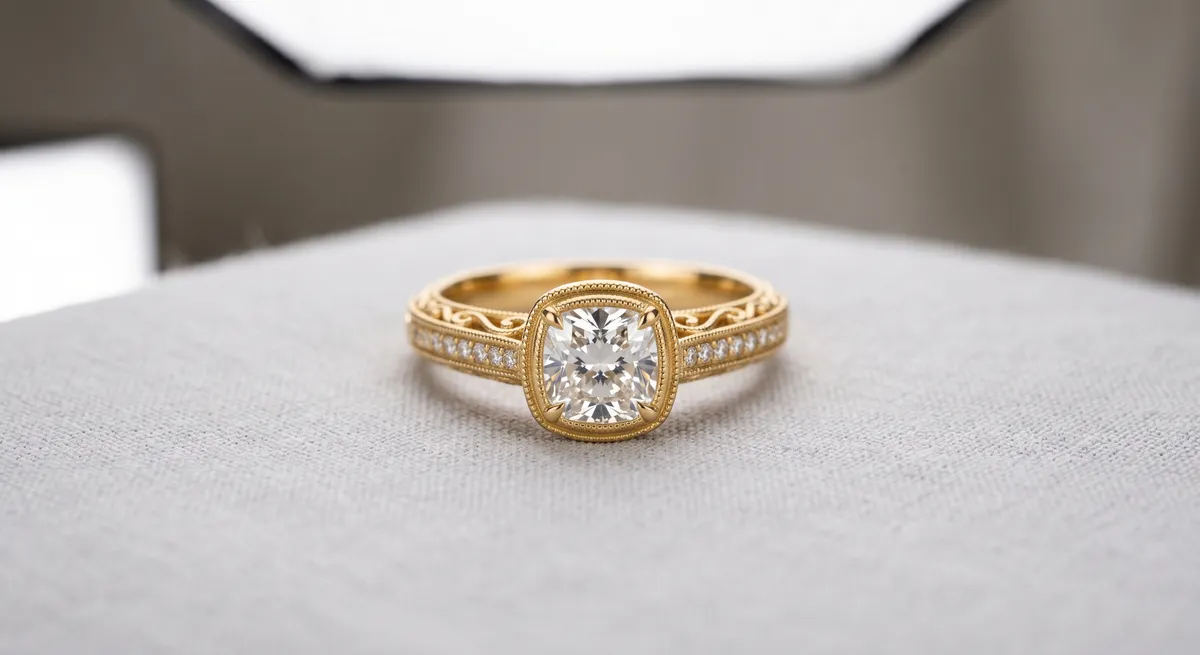
Gold should look warm. Yellow gold at correct white balance has a clear warm, orange-yellow tone. If it looks pale, greenish, or desaturated, white balance is off or there is a reflected cast from a nearby surface. Rose gold should appear pink-warm. White gold, which is actually silver-toned, should read like a neutral metal with a very slight warm cast from its plating.
If the tones are wrong even after setting white balance from a gray card, the problem is usually a color cast in the reflections, not the white balance setting. Look at what is near the piece and remove anything with strong color.
Keeping Consistency Across a Set
Color consistency matters as much as accuracy. A product catalog where every frame has a slightly different color temperature creates a fragmented impression even if individual shots look acceptable in isolation.
Do not let the lighting change between pieces. If you are shooting near a window, close the blinds or shoot at a time of day when direct sunlight is not shifting the color temperature of the ambient fill. If your studio lights have a warm-up time, run them for ten minutes before shooting and leave them on throughout the session.
Keep the same white balance value for every piece shot under the same lights. If you change the light position significantly or add a second light source, shoot a new gray card frame and update the reference. Apply white balance corrections at the batch level in editing, not frame by frame.
A small additional step is to include a color checker card in your first frame. This gives you a reference for the full color palette of your lights, not just the neutral midtone, and lets you correct any remaining color channel imbalance in Lightroom or Capture One using the color profile tools.
For gold-specific techniques including how to shape warm reflections, see the guide on how to photograph gold jewelry. For silver, including reflection control and black flags, see how to photograph silver jewelry. The jewelry photography overview covers the complete workflow from setup to export.
Frequently Asked Questions
Why does my silver jewelry look blue or my gold look green?
Auto white balance is guessing wrong. Set a custom white balance from a gray card shot in the same light.
Do I need a gray card?
It is the fastest way to accurate color. A white balance card or a known-neutral white surface also works.
Related guides
How to Photograph Gold Jewelry
How to Photograph Silver Jewelry
AI Retouching & Background Removal Workflow
Keep exploring: the complete guide, gear reviews, pricing, or find a photographer.